
Customizing The Bat Molds
add more of YOUR artistic style

- A slab the thickness of the desired plate was inserted and ribbed into the desired contour.
- A triangular shape was removed from the slab to create a scalloped edge and a 1/4 inch space was left at the edge of the slab.
The mold set up was given multiple layers of PureLube Mold Soap and poured with 80% Pottery Plaster #1 and 20% Hydrostone.

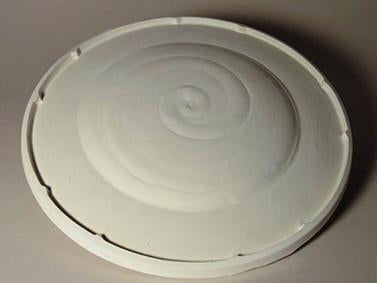
A finished plate

- A slab is inserted the thickness of the desired plate
- Center of slab is removed, (a squared shape in this example)
- Remaining rim is angled and shaped for the desired rim
- Rim is facetted with a metal rib
- At least a 1/4" space is left between the rim and the mold
- The rim is scalloped by removing a triangular shape with a punch tool (see photo)

- The mold set up was given multiple layers of PureLube Mold Soap and poured with 80% Pottery Plaster #1 and 20% Hydrostone

Finished plate has scalloped & facetted rim.

- A slab is inserted, center removed and rim is shaped
- The rim is then stamped
- Outside edge can be scalloped, leaving space between rim and mold

Plaster Bat with stamped pattern.

The scalloped edge was further defined with a bevel tool.
Other Useful Tools

Bevel Tools
- A small nip is taken out with the nippers to start the groove (top)
- A rat tail file is used to form a groove of the desired size
- Unnecessary formica that could interfere is removed
- A slightly curved shape groove is used to remove the outer seam on a plates rim (second from top)
- A more pronounced groove is used to round an edge and cut in a groove to further define a rim
- Multiple grooves can be added, too (bottom)

Cutter Tools
Cutter tools can be used to remove a triangular shape on the edge of a plate set up to create a scalloped rim. Metal flashing can be cut to make a facetting tool.

Wood Rasp
A wood rasp quickly removes plaster to create wheel head bolt clearance on the back of bats.

Galvanized pipe is covered with pipe insulation and bolted to sturdy shelf brackets to create bat storage on a wall.

Bisque fired chucks can be used to support the mold on the wheel when shaping an inserted slab.
A Bat For Small Work
Joseph Crawley of Asheville, North Carolina developed an easy way to make an Insert Bat.

He centered an 8 inch tile in the bottom of our flat bat mold and added a plug of clay in a corner of the tile. This plug will create a hallow space which will later allow for easy removal of the tile from the bat. He then poured in the plaster, added some hardware cloth or window screen to strengthen, and then seated the Quick-Release.
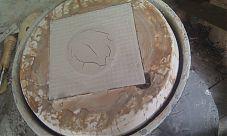
He throws on the unglazed side of the tile because it is more absorbent

Modifying the size and shape using the carving method

Ingrid Powers Modified the #3 Dinner Plate using the carving method. Her plate is smaller at 11" before bisque.

She used these to tools to round and flatten the lip and to establish where the lip of her plate will be.

While Stephen Smilove prefers these tools.

She threw the foot and eliminated trimming...cutting her work in half!